We may earn money or products from the companies mentioned in this post. As an Amazon Associate, I earn commission from qualifying purchases. This is free to you and I thank you for your support.
Stained glass Easter window clings
I admit I have an obsession with stained glass windows. The church I attended as a child had a huge window at the front of the church and I loved it so much, I usually stared at it throughout the sermon. It’s hard to find beautiful old buildings that still hold that charm to them.
Using some creativity we came up with a way to make our own stained glass Easter window clings.
Gather your materials
Plastic
Black glue
Sharpies
Templates to trace
tape
Good to know
For the plastic I used one 1/2 of a laminating pouch, but you could use crafting plastic or plastic from a to go container, just make sure you can use a sharpie on it and it won’t smear off.
To make the black glue you will need an 1/2 empty glue bottle and a bottle of black acrylic paint. You will add the paint to the glue to turn the glue black. Once you add the paint, shake that bottle until it’s mixed throughly.
For the templates, you could either free hand your drawings, find your own elements to print or I have included a free printable of my templates. look for the templates below in a pink link that says “printables”.
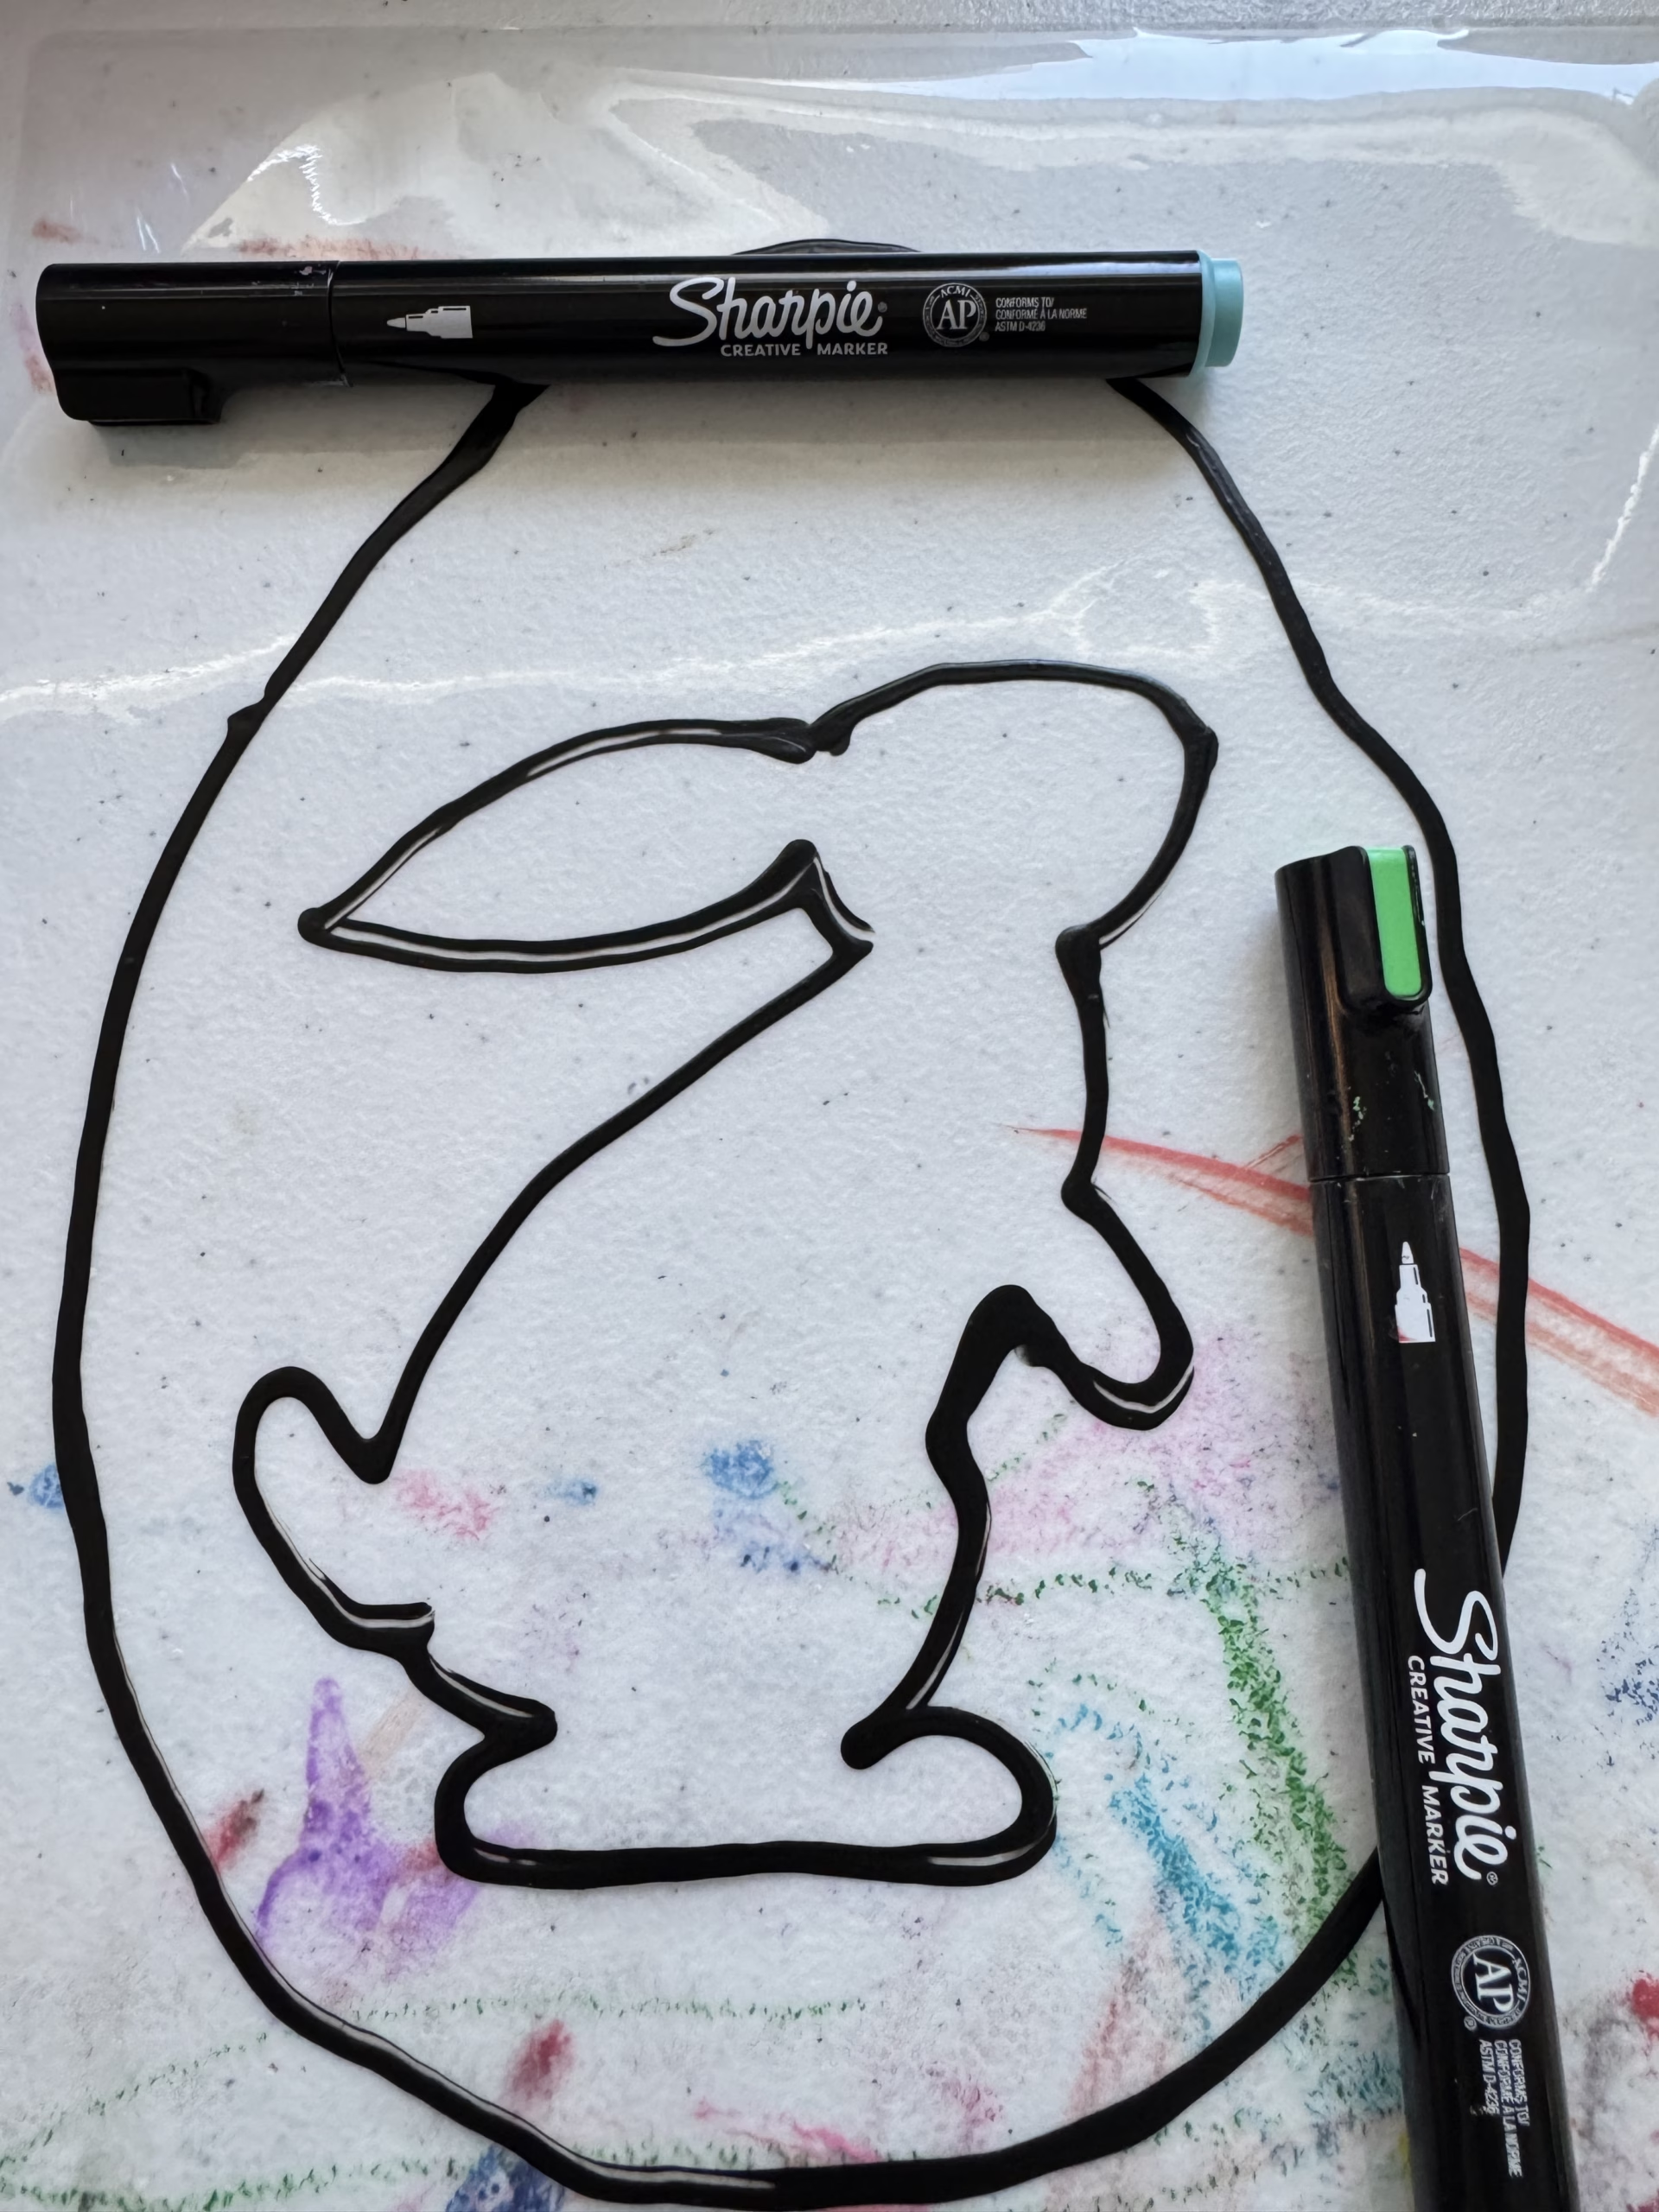
We used the Sharpie brand creative markers, we absolutely love these markers and they are used constantly at our house.
I had every intention of used double sided tape to hang mine on the window, however I could only find packaging tape, so that’s what I used.
Put it all together
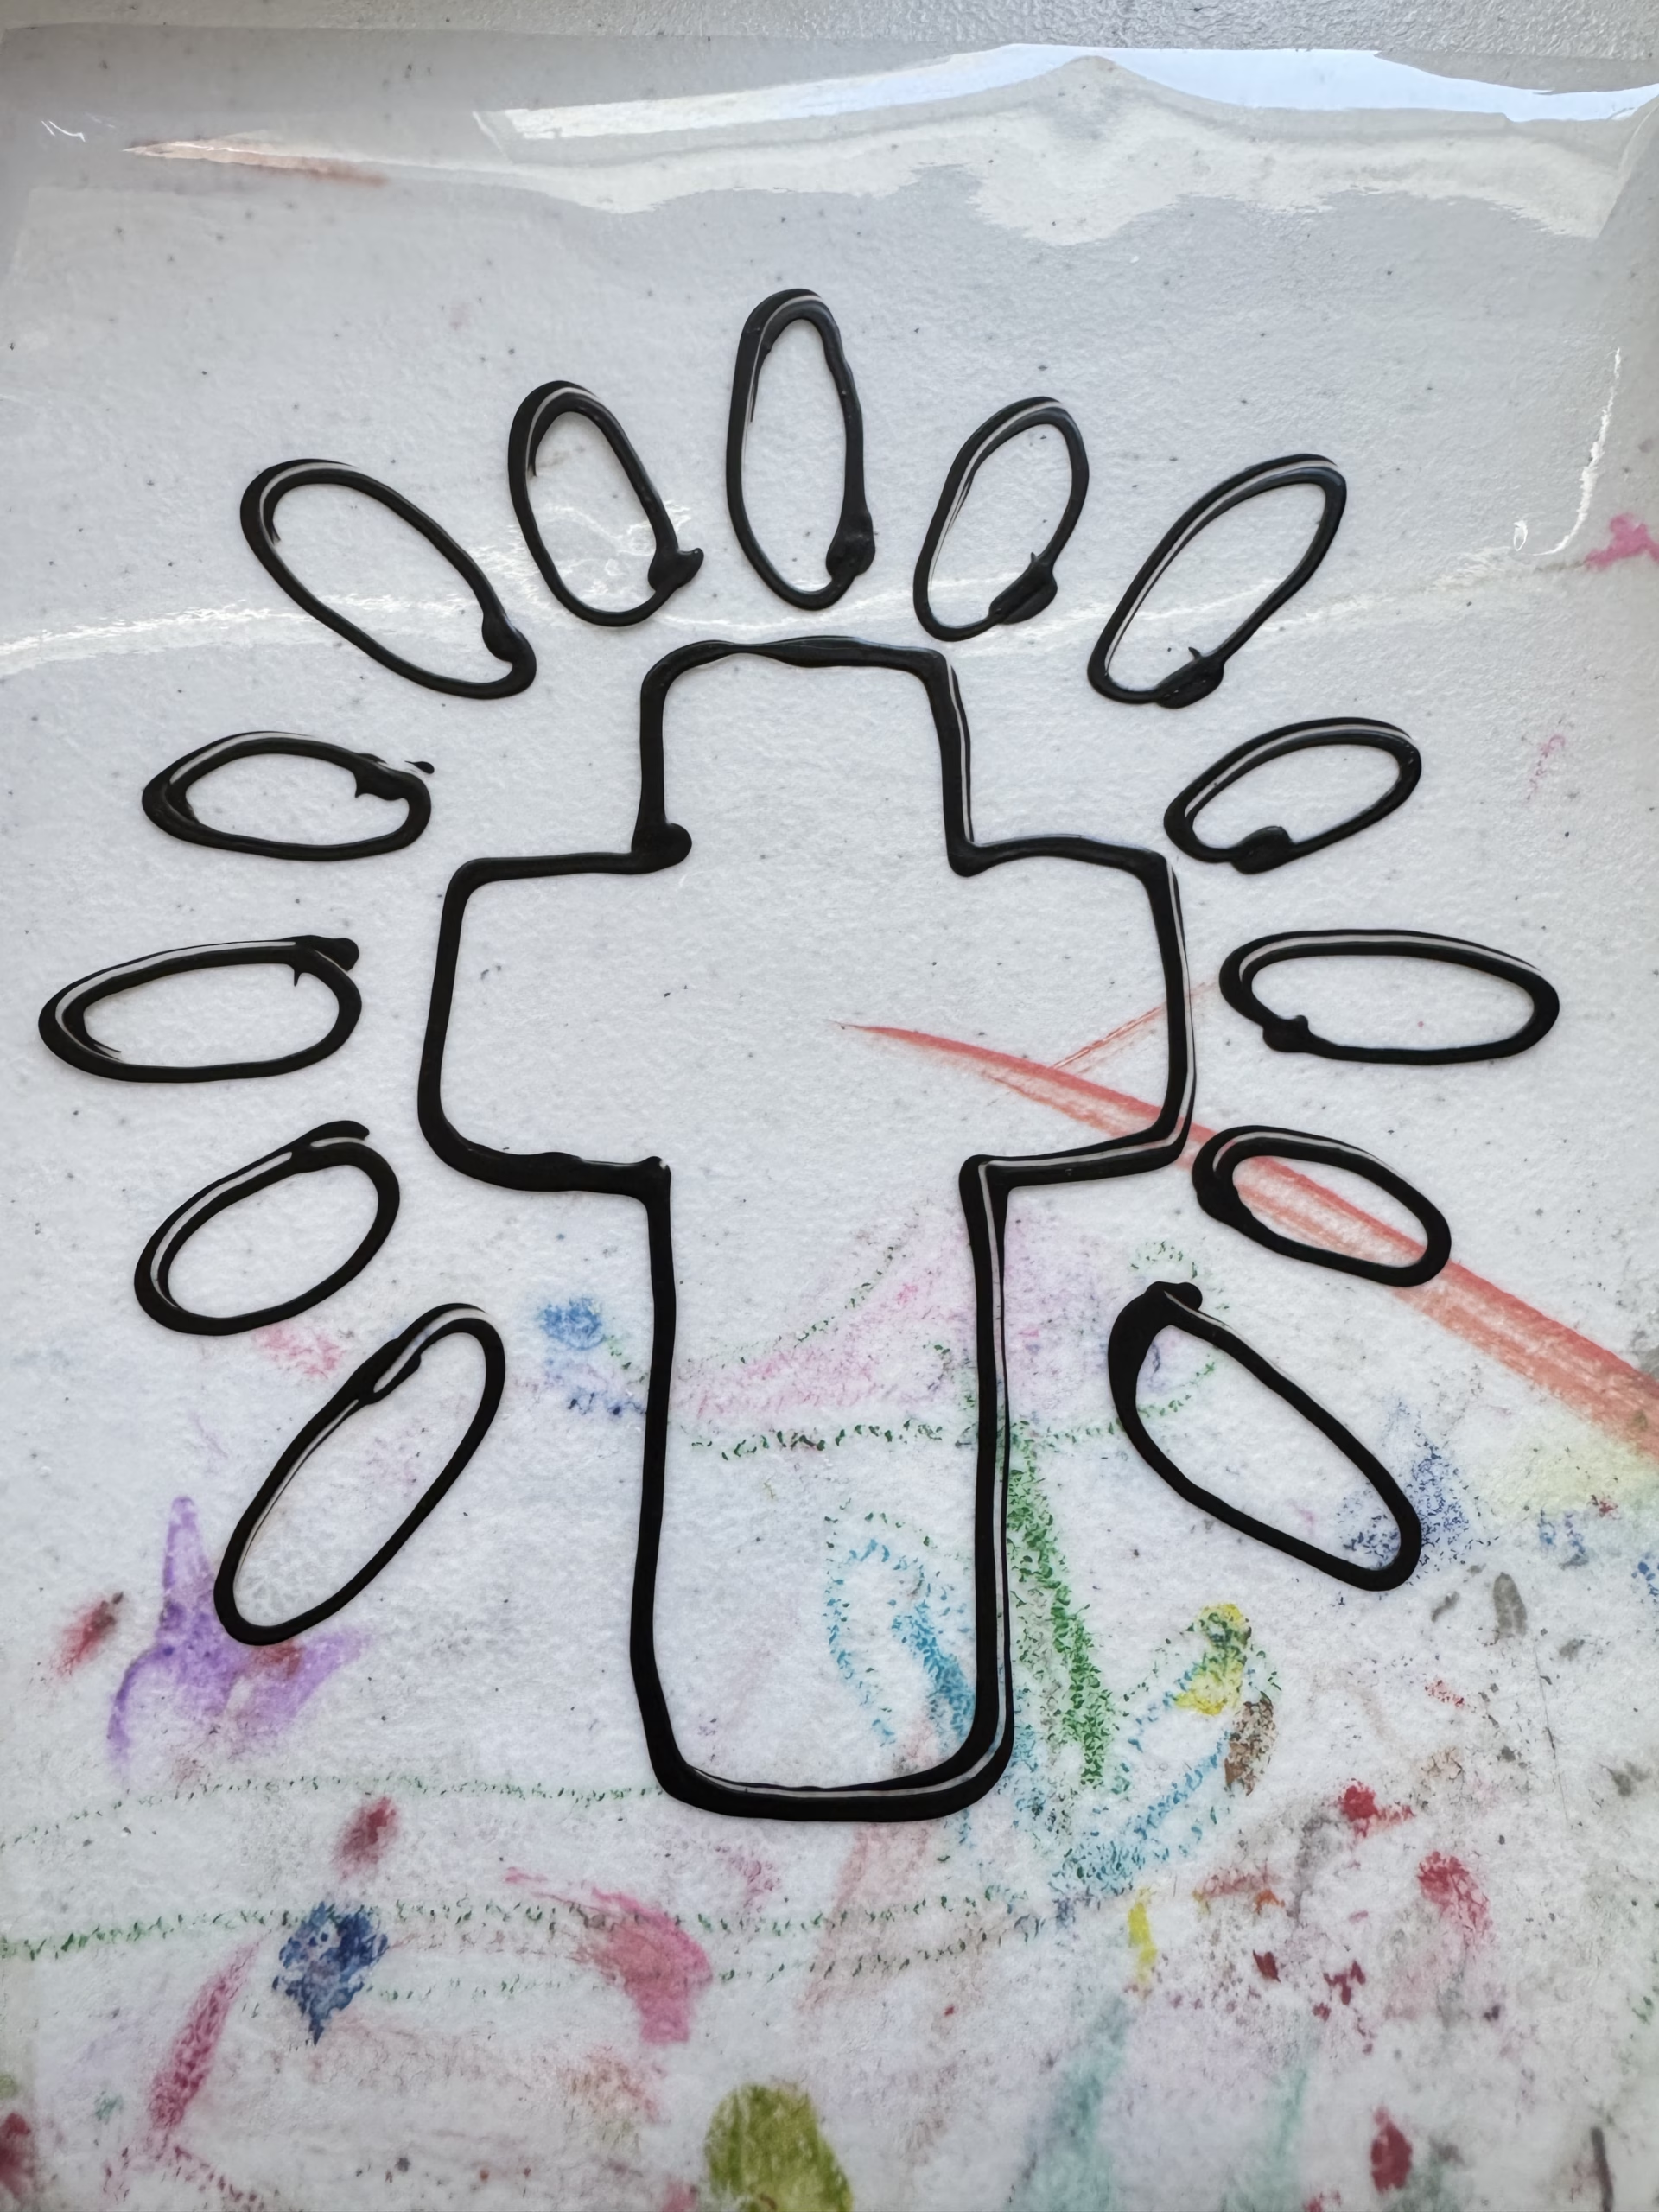
I took my plastic sheet and placed it on top of my printed templates. Using the black glue I traced the designs.
Once the design is traced I put them in a safe place to dry. This step can take a while so I’d recommend planning ahead for this craft and doing it before bed or wait an entire day to move on to the next step.
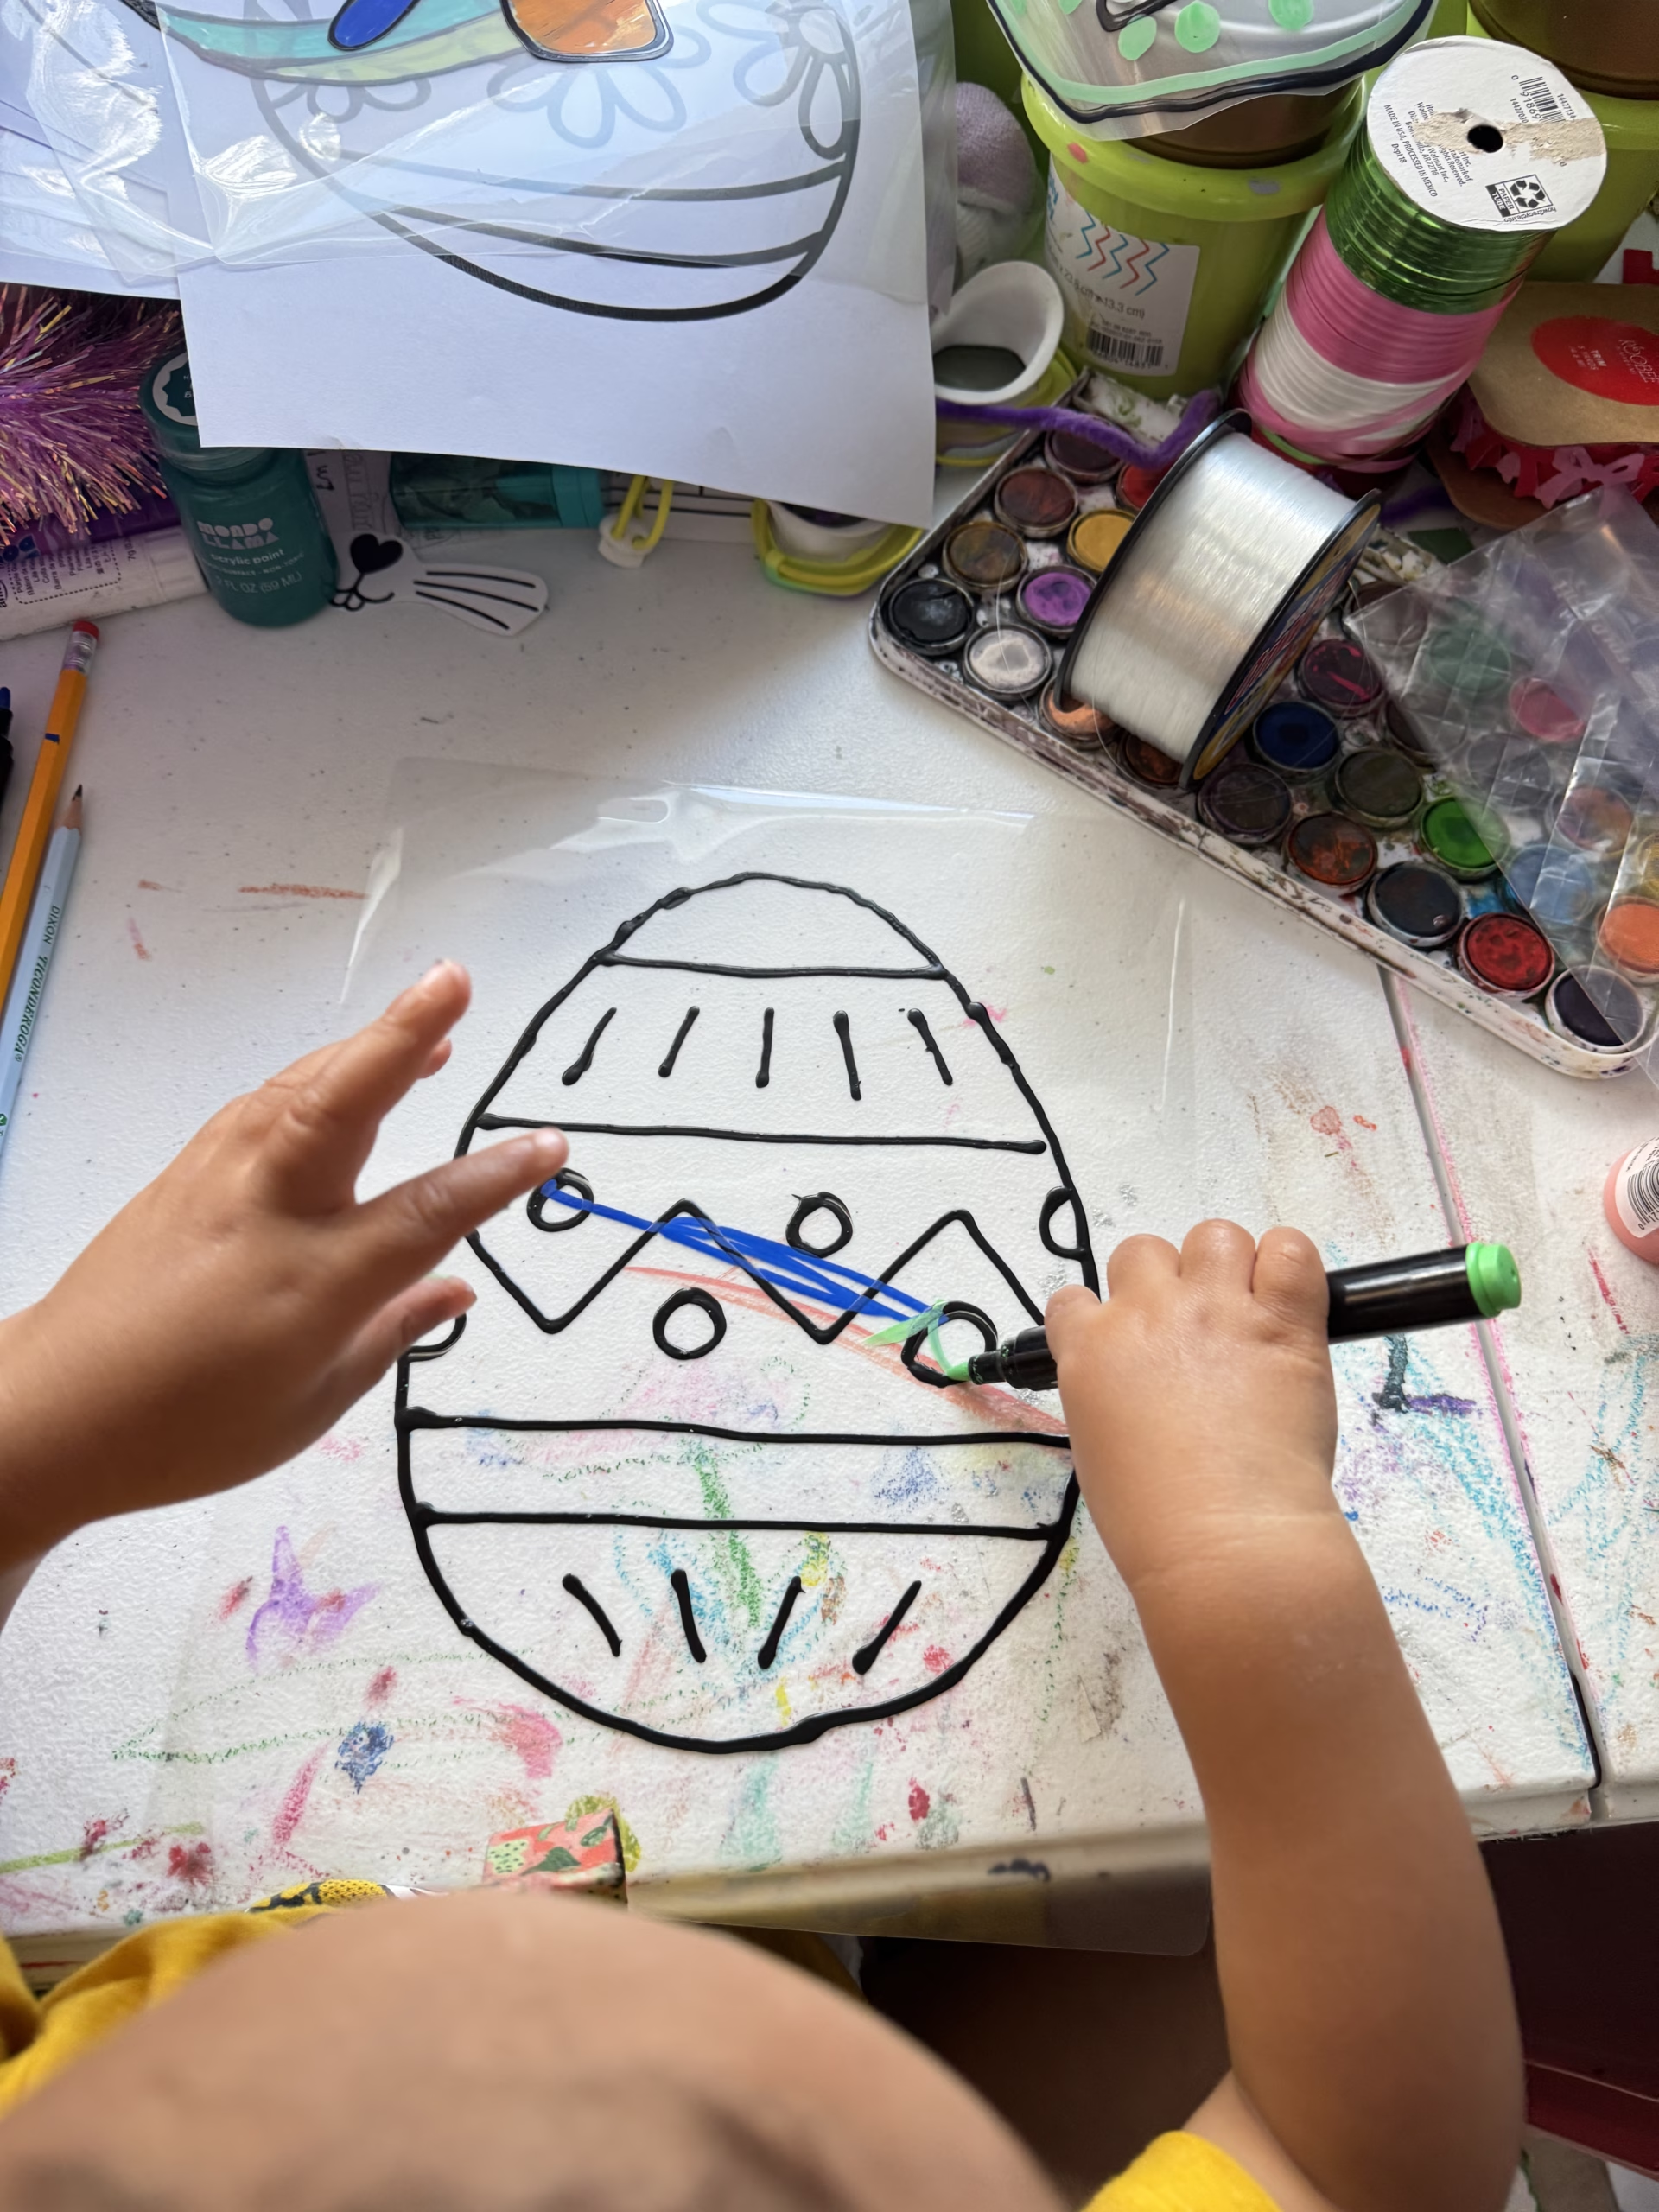
Once dry this is where the kids get crafty and use the sharpies to color in the designs. All the colors are going to really pop against the black puffy glue! I like to give the sharpie a little time to dry between coloring and the next step.
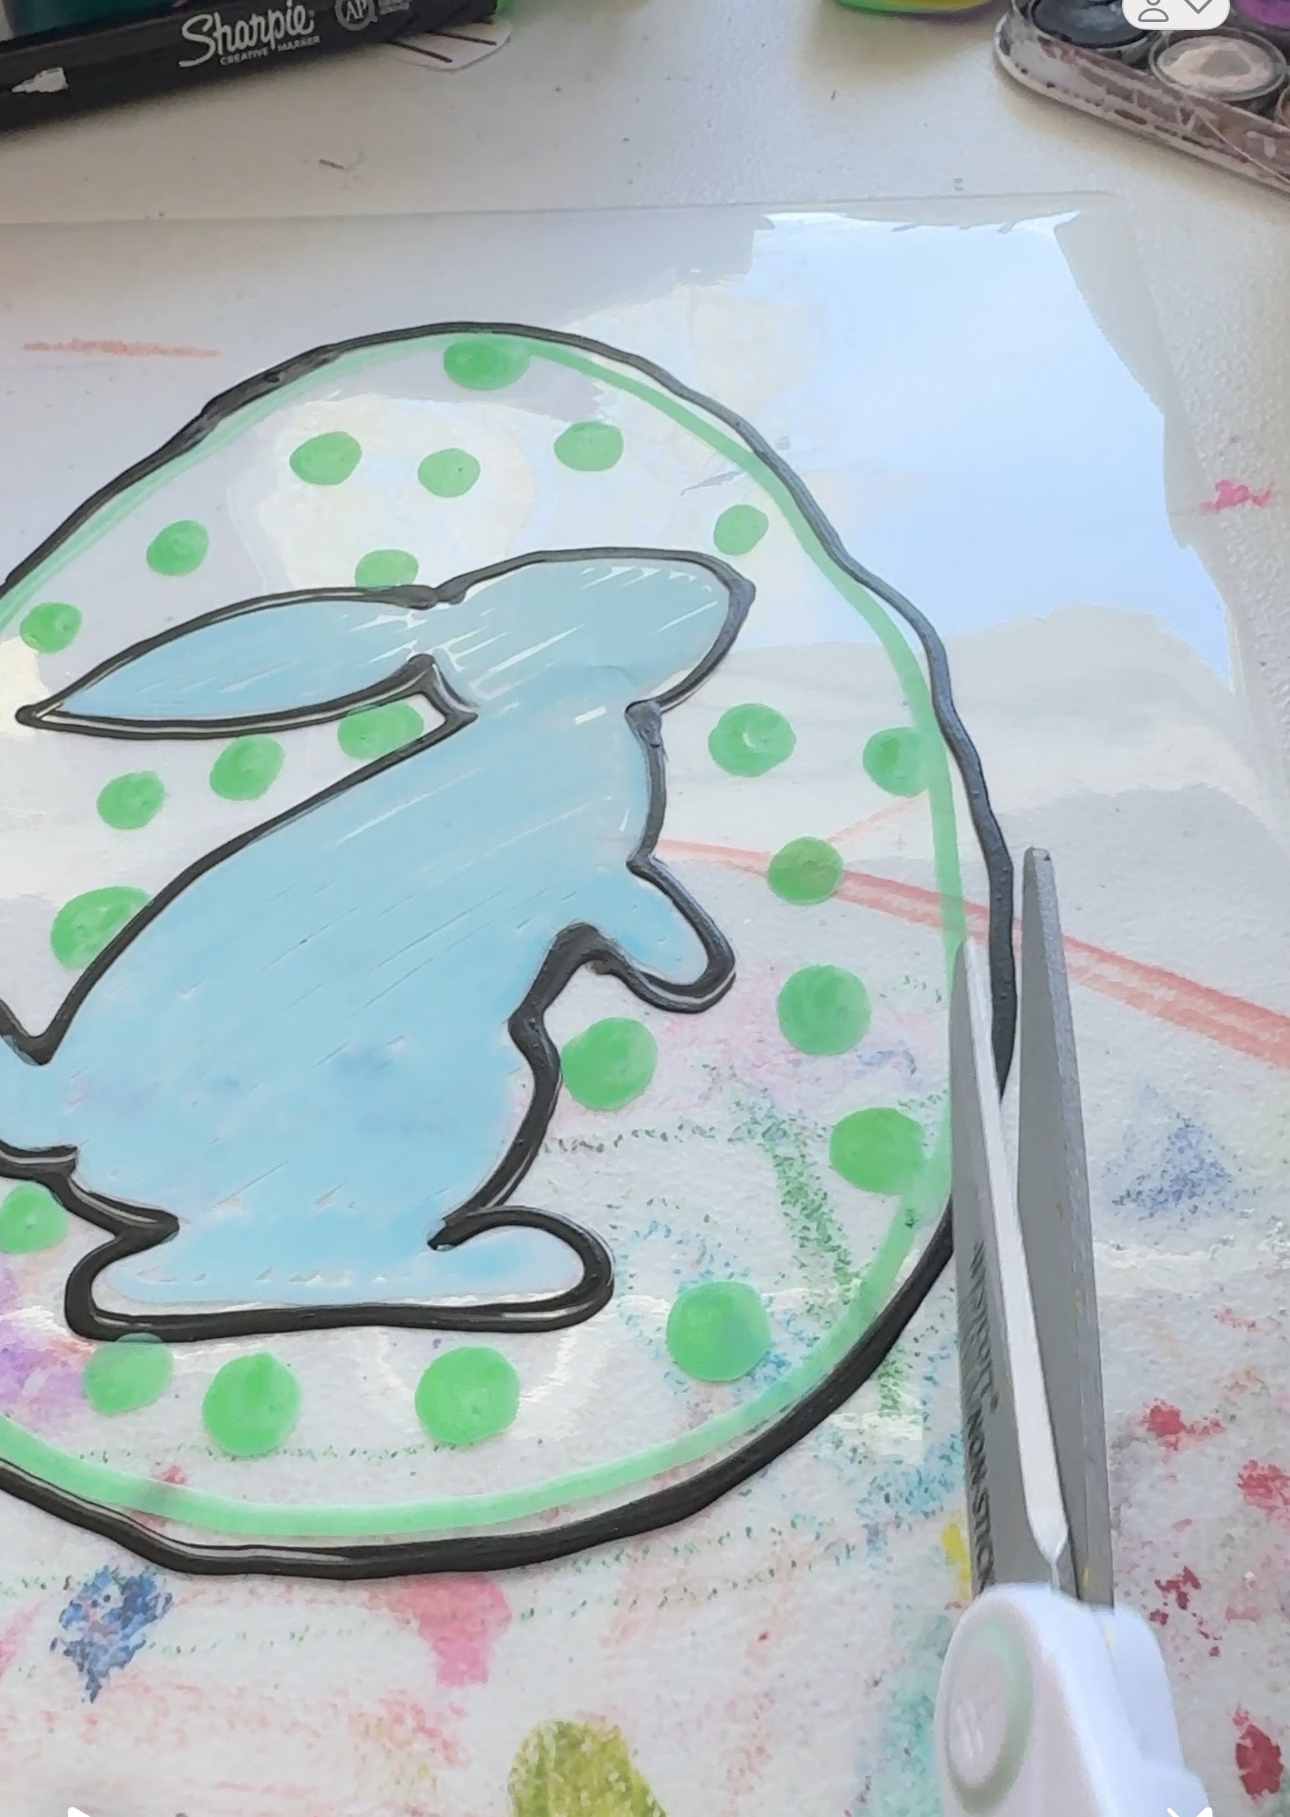
After the coloring is complete it’s now time to cut out the stained glass Easter window clings. The kids can put their cutting skills to the test and cut out each design. Or you can do it for them.
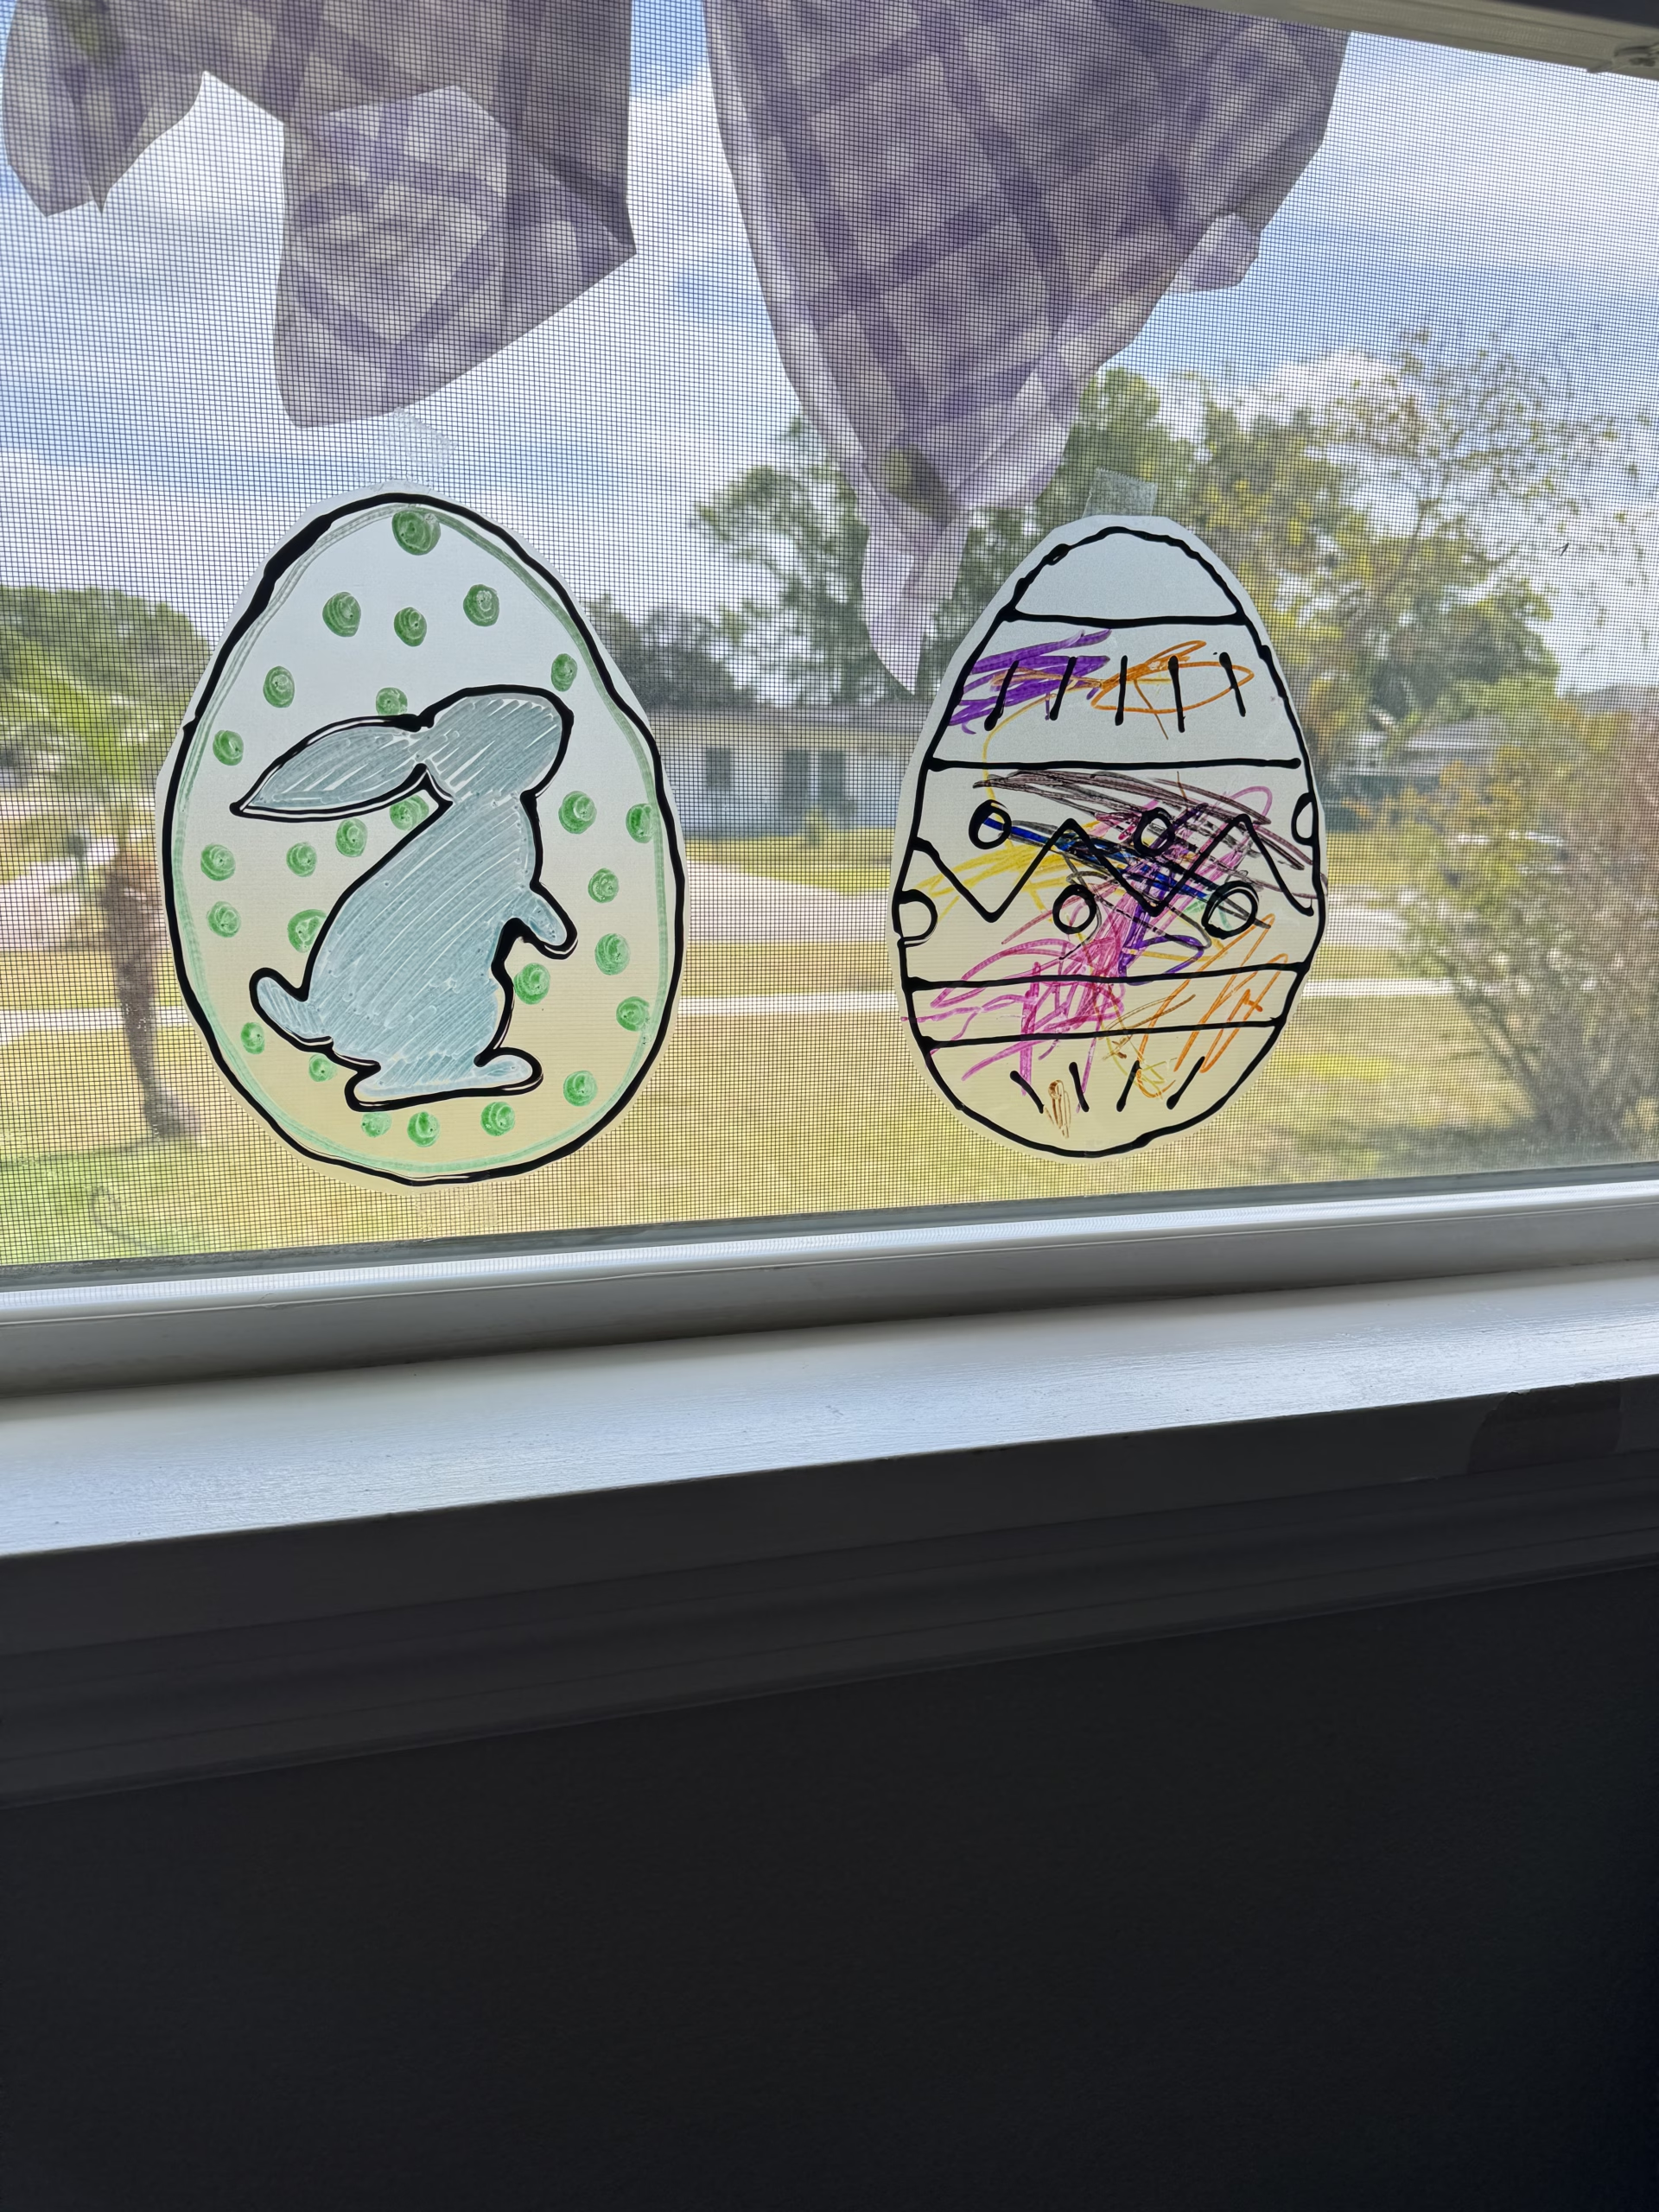
Once cutt use double sided tape to adhere the Easter clings to the window!
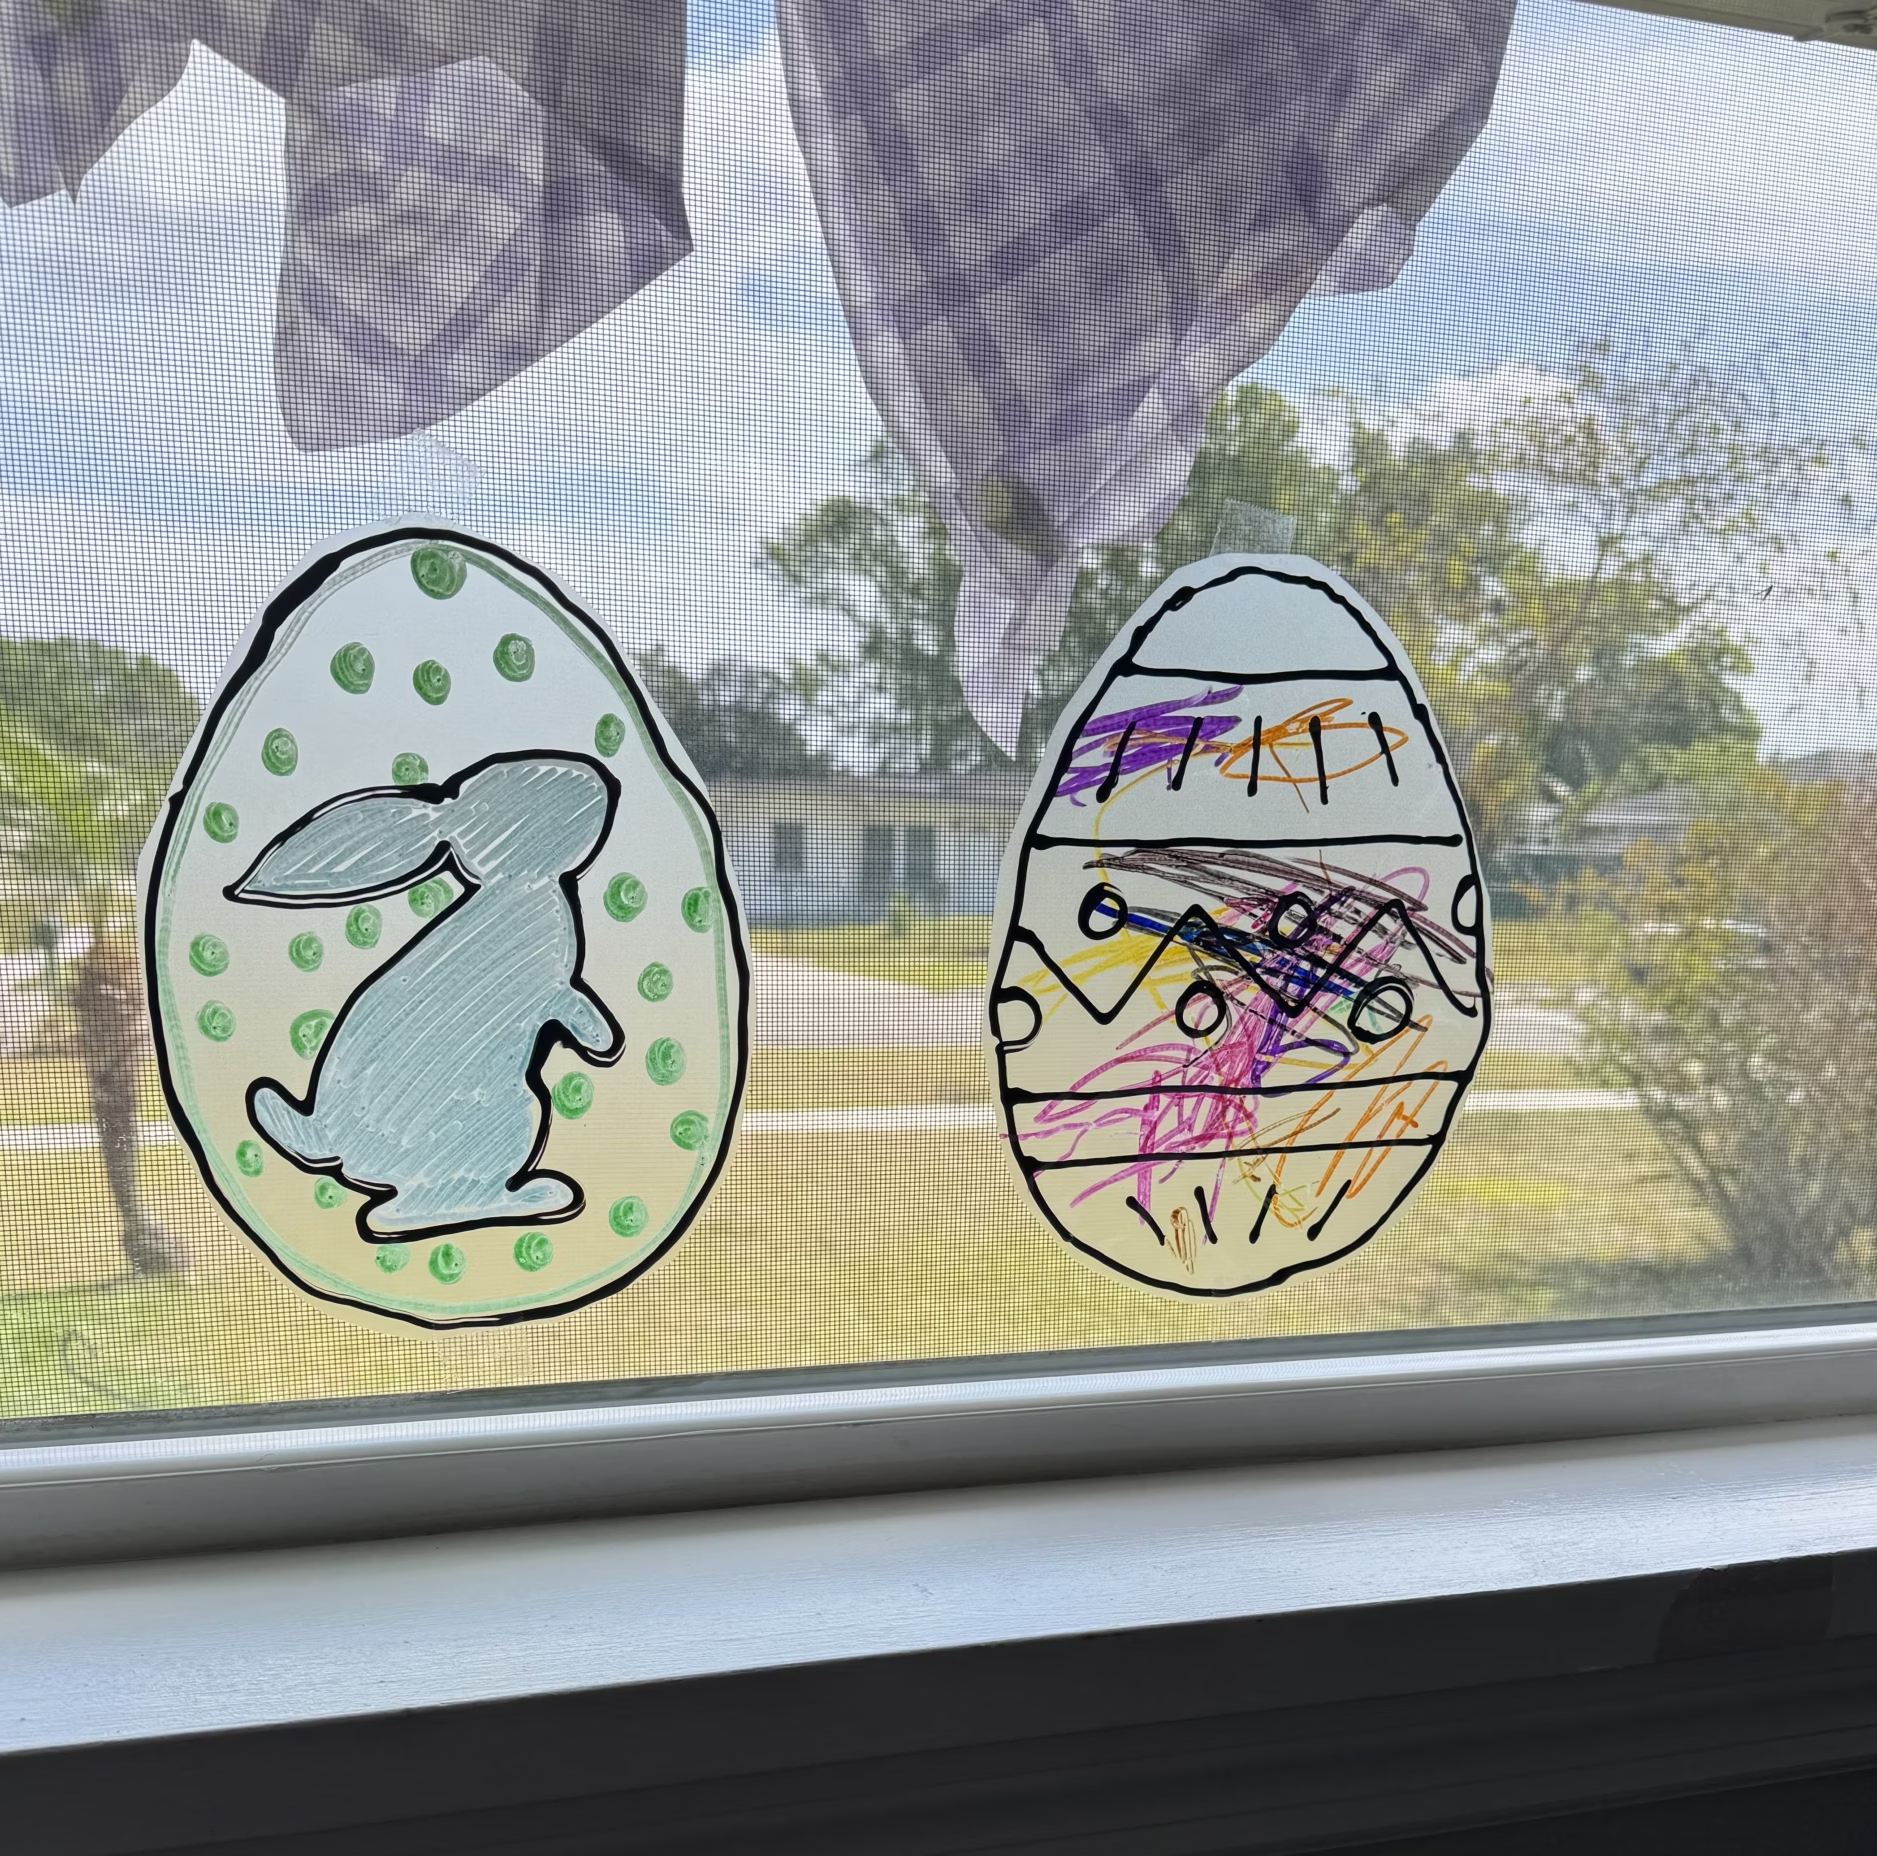
Tada
Then stand back and admire the beauty you and your kids created!
As always If you make it, share it cause we all love a show and tell. Tag me on IG @homesweetmartins


Leave a Reply